This page is dedicated to share scale modeling and other hobbies to all other enthusiasts who also love these stuffs. Hope you enjoy and please feel free to give me some comments no matter good or bad. Joey
Showing posts with label Honda CB750 Custom. Show all posts

Wednesday, November 6, 2013

Honda CB750 Custom (4)

God! How can I missed to share the most horrible nightmare in the project?!
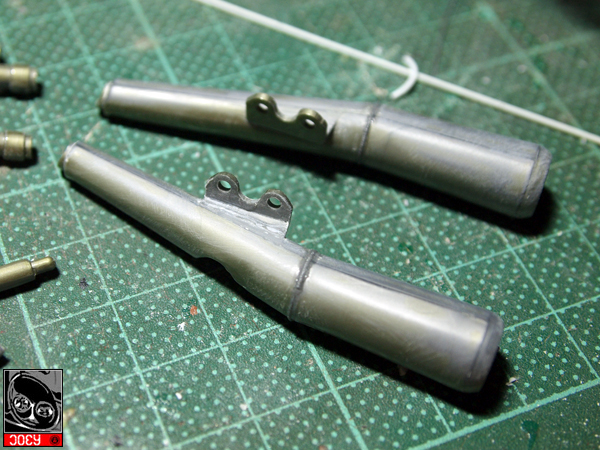
These 4 air funnels were recreated with plastic tube modified with extensive "hardcore" effort!
It took me an entire evening just to safely deliver these 4, with more than a decent has failed......
And from the end result, these things don't even look like a mod work! (Lord!)

Anyway, just to share this as this can technically been done by hand instead of relying on aftermarket parts, which may not always fit the exact size required.


Tuesday, November 5, 2013

Honda CB750 Custom - Completed

Thanks for watching


Honda CB750 Custom (3)

I have been out of town for almost a month so there hadn't been any progress at all. 
But the good thing is there are just a few tiny things to work on before putting this to an end.

First of all, I have "aged" the leather saddle... It was just a trial and error to brainlessly apply some Andrea acrylic paint on the edges. It was not very successful at the beginning but with some luck, I am able to get a satisfying outlay now.


The other thing I was about to add is a helmet. I used to have a couple of AGV GP-Tech built but this time it will be a simple city helmet. I get a donor parts from a 1:12 F1 garage kit as a base. I completely modify the shape until it looks like one of the reference AGV city helmet. Additional lines are engraved.


I have added the starter key to the starter kit in front of the engine. This is my signature to put a "Remove Before Flight" tag on my bike kits.

A rear light was scratch-built as well, referencing some of he bicycle rear lights. But I added a wire which connect back to the console to signature the bike is controlling if the light goes on.

More on the helmet as it underwent some decal and coating work.

Then I quickly turn it into a painting mode as I hand painted the interior cushion as well as the leather buckle belt.

This is way more fun than how I have expected this helmet to be. This is so fun to put up such a simple but dedicated piece.

After some final touches, this CB750 Custom is good to go!


Tuesday, September 24, 2013

Honda CB750 Custom (2)

There has been a longer delay on his update as I have been caught by a urgent travel arrangement at work. I struggled with time that allows me to focus on preparing all those stuffs, along with my later South Korea trip, as well as my cycling activities... not to mention the GTAV release! LOL

Anyway, here are the updates.
Things were getting finalized in terms on fit and size. I had to give up reshaping and reshaping things all the time so I could come to a point to start the actual painting job. The fuel tank would be in chrome so I have laid a good layer of base black and a prime of clear coat just to make the the foundation is right.

The chrome paint I tried this time works so perfectly and it really amazed me! It is so much better than the Alcad II #107 as I can touch it afterwards and it can also be clear coated if needed.

I got some parts from my previous M1 left over. This was the rear wheel fender that I will need to reshape it a little to fit in.

Some more parts were also getting reshaped...


Here is another view of the fuel tank and saddle.

Giving up adding more stuffs, I have started to assemble things onto the frame. 

Jesus! I actually forgot to leave room for the fuel tank cover! How could I fill up the tank without the opening?! I had no choice but o drill a center hole and then repaint the tanks all over again....

The engine tips I had 4 cups scratch built by plastic tube and sheets. It took me a couple of nights to ge these 4 done....

Finally this is getting back on the right track!

I added as many screws and pins as I can all over the frame.

And weathering on the exhausts were becoming the signature touch for any of my bikes now~~

Of course there has been to be wiring work on it so I can fire up the bike

Additional parts were added to give more rooms for wiring.

And after some nights of late sleep, the bike is almost ready to rock!

The engine starter has been customized to stay next to the engine. I will add my final touch the next.

I have only bring in one of the twin meters on this bike. Hopeful it has all the info that is needed.

The leather saddle has been refined in more different shades of  colors.


Monday, September 2, 2013

Honda CB750 Custom

Hi mates! 
I am so glad to share with you all my latest project. I wasn't able to upload the pics before as you know I have been busy with my cycling hobbies ~~ haha ~~
Anyway I am undergoing a transition at work so have been able to get some relief on my evenings. And that's how I have got some quality time to get this project started.
Here is the deal. It is a classic Honda CB750. I know nothing about this ride until I started digging for references on the Internet. And in fact, I still don't know much about it at all now. Yet, I've got some gorgeous pics of some custom builds of this CB750 and these pics inspired me to give a try.
I didn't have a clear idea on where I want it to go. But I think step by step, I will bring it to the finish. 

Here is the original box-art, classic but not so exciting.... LOL

I, of course, started by putting the major blocks of the engine together.

And started pre-assembling the frame.

The original cowlings looks like this.

And that was what I actually pull over... and started reshaping the new fuel tank.


After sanding and sanding and sanding, I think this is what I would like the fuel tank to look like.

Putting aside the sand papers, I have moved to something else. This was real fun to rework the springs and this gives a lot more depth to the details.


The exhausts were prepared. Gaps are filled and the welding was recreated.

I scratch-built the saddle with plastic sheets. I was about to give more volume to it later on.

The tail of the frame has been shorten and I added a copper rod to close both ends.


The saddle will contains better finishes if the edge are well sorted.

I have also added the physical mount which should hold it tight on the frame.


Let's see how these things look when come together.


The handle bar will be with a completely different angle. So the mounts had to be recreated.


I have also got some ideas on the new meter. I will just give one meter on this bike instead of two.

I know it is a bit to digest. Let's stop here for now and I will keep you posted with any updates. Thanks for reading.
 
free counters